
Transport Fever 3 Train Signals: Placement and Rules Explained
How train signals work in Transport Fever 3: block sections, direction rules, parallel-track placement, and the mistakes that cause jams.
Prefer video? Caticko demonstrates every signal type on live track:

How to Use Train Signals in Transport Fever 3 (Beginner's Guide)
What train signals do in Transport Fever 3
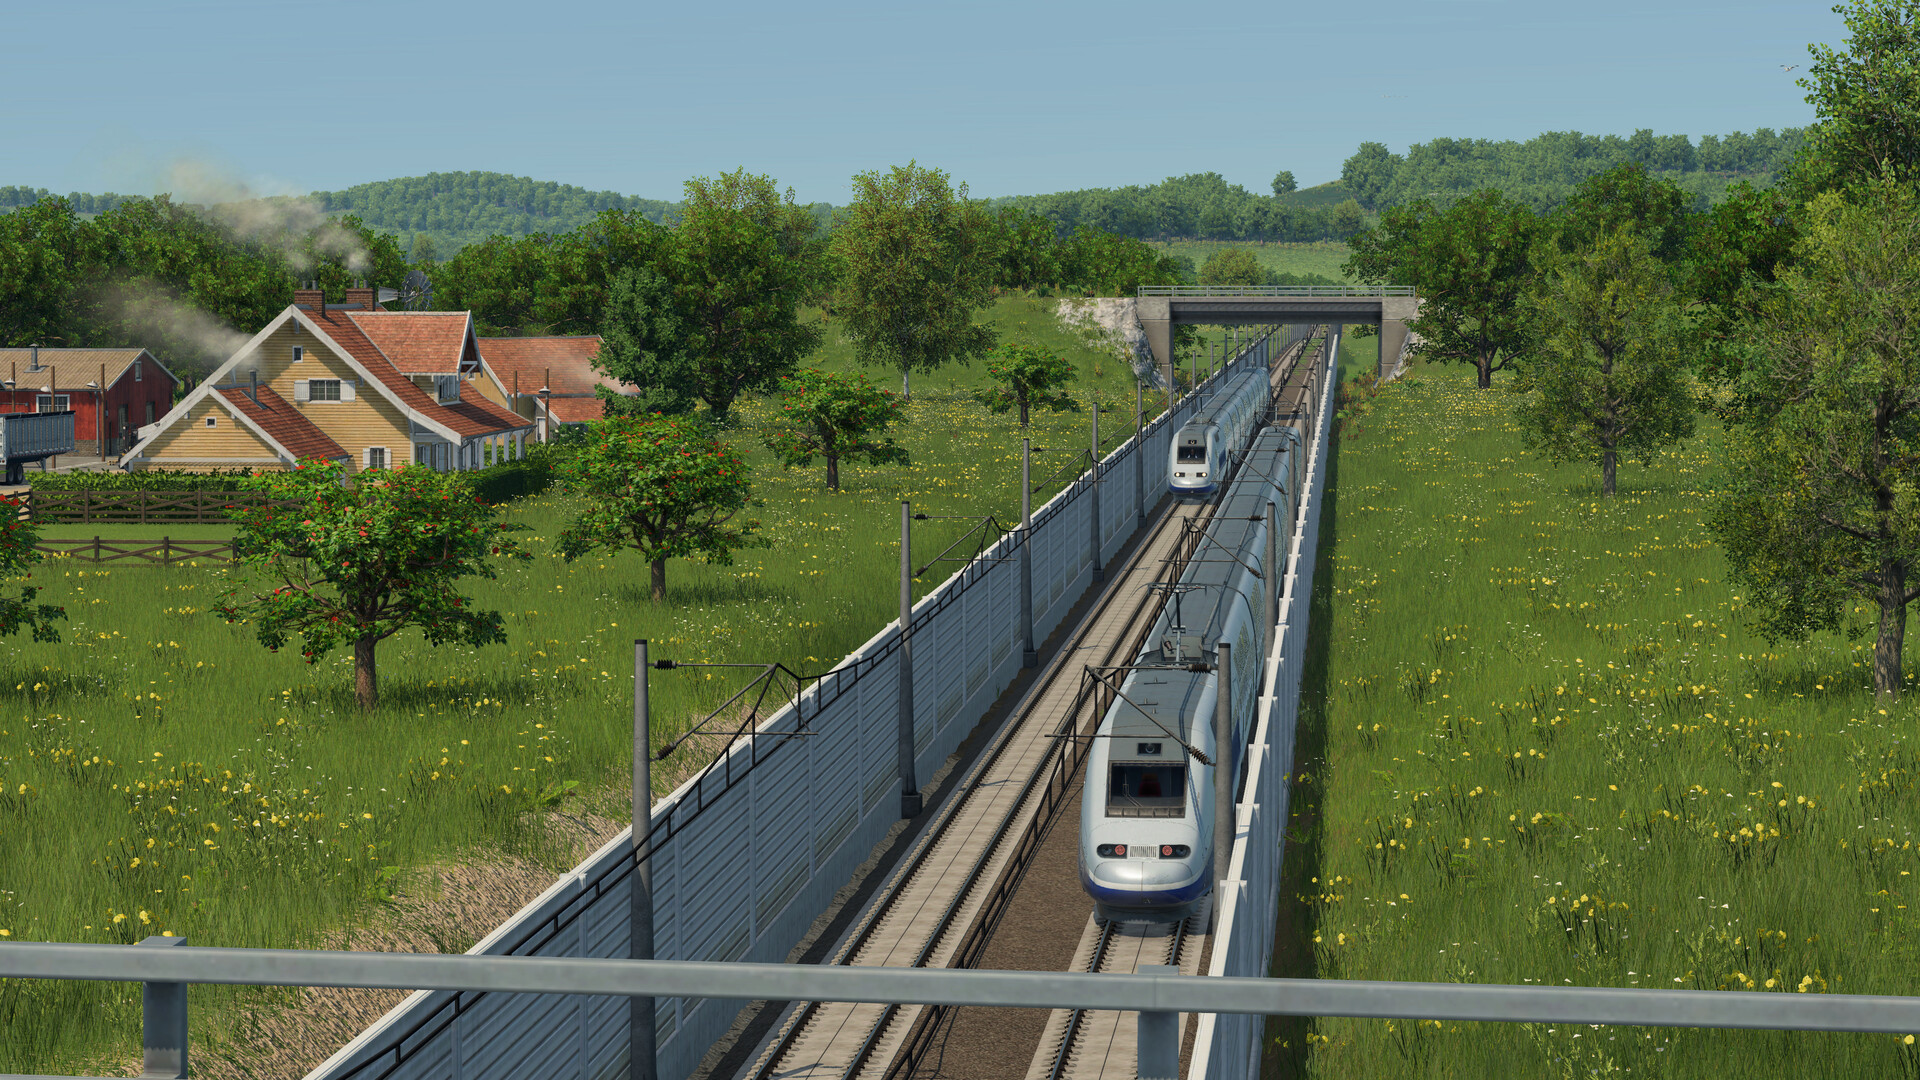
Two trains sharing one corridor without conflict — this is what a properly signaled double track looks like: one track per direction, blocks keeping trains apart. Screenshot: Urban Games, via the official Steam store page.
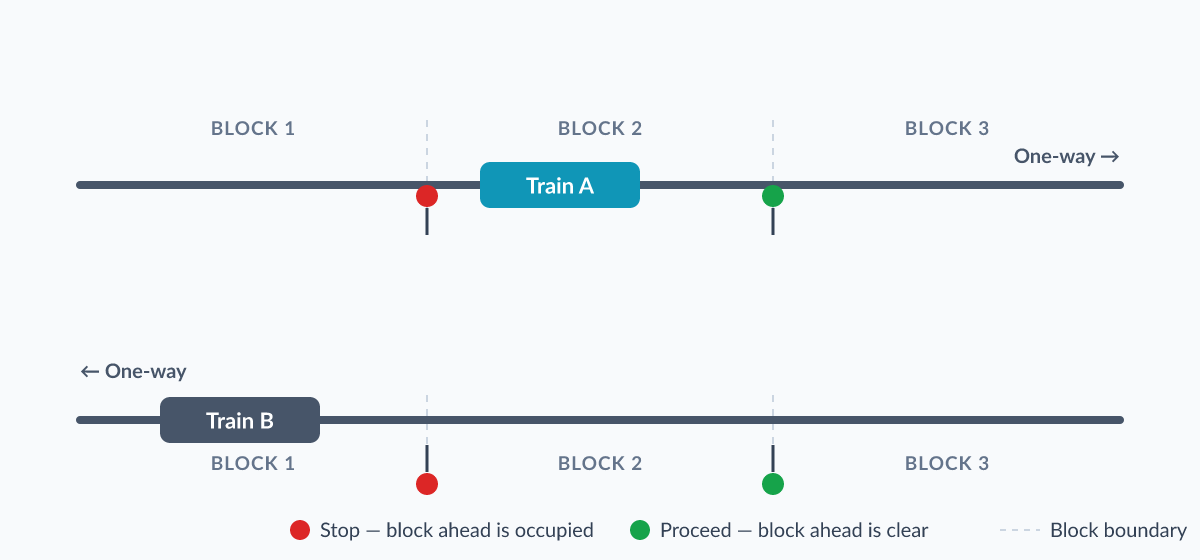
Concept diagram: each track runs one way, and a signal only clears when the block ahead is empty — that is the whole system in one picture. (Original diagram.)
Signals do two separate jobs on a railway, and most signaling mistakes come from thinking about only one of them.
The first job is the familiar one: signals cut a track into sections so trains cannot run into the back of each other. A train may only enter the next section when it is clear, so a following train holds at the signal instead of piling into the one ahead. This is what lets you run several trains on a single line at staggered intervals — in the recorded playthroughs, players copy a working train onto a busy line and let the signals keep the services spaced out instead of bunching up.
The second job is easier to miss: signals also decide which way trains travel on a piece of track. When a parallel pair of tracks is built, the direction of travel on each track is defined by where the signals are placed. The recorded line ran on the right — the same keep-right convention as road traffic — and that came from the signal orientation, not from any settings menu.
Where to place signals
Four placement rules cover nearly every situation a normal campaign will throw at you.
Parallel tracks must be paired with signals. The moment you lay a second track alongside the first, each track needs its own signals to define its direction and its sections. The source playthrough treats this as non-negotiable: parallel tracks are comparatively cheap to add, but they only work as two one-way roads if the signals tell trains which is which. An unsigned pair is just an expensive way to stage a head-on. For a sense of scale, doubling the track at one early-game passenger station ran to roughly $1 million.
A long line needs only one pair. You do not need to carpet a long rural line with signals. The source run includes a cross-map freight trunk that operated on a single pair — one signal for each direction. Signal density matters near stations, junctions and crossings, not out in open country. If you are still planning your first line, the beginner guide walks through the layout decisions that come before signaling.
Put a signal in front of level crossings. Where the railway crosses a road at grade, place the signal before the crossing, not after it. A train held at the signal then sits short of the road; without one, a queuing train can park itself across the crossing and block every vehicle in town until it finally moves.
Signals work inside tunnels. You can place signals within a tunnel, not only on open track. That matters because a long tunnel is exactly the kind of bottleneck you want broken into sections when more than one train shares the route — a stopped train inside a tunnel no longer has to freeze everything behind it.
Track and slope basics that interact with signals
Signals can only manage what the track allows, so a few layout fundamentals decide whether your signaling actually pays off.
The second track of a parallel pair is relatively cheap. Compared with most heavy infrastructure, adding a parallel track alongside an existing one is a modest expense, which is why doubling busy stretches is the standard answer once traffic outgrows a single line. The catch is the rule above: the new track only earns its cost once it has its own signals and its own direction.
Watch your grades when track meets a road. Laying track that hugs an existing road can produce brutal climbs — around 9% in the recorded case. Clearing the road and re-laying the track on the freed ground brought the same stretch down to about 1%. That difference is enormous: a 9% crawl throttles every train through it, and one slow train sitting in a shared section quietly undoes everything your signals are trying to organize.
Keep grades near 3% in rough terrain. In the mountainous parts of the map, an 8% alignment was simply not workable in practice. The answer on film was to route through a tunnel and hold grades to roughly 3%. Slow sections are where lines grind to a halt, and every percentage point of grade you avoid is speed your signals do not have to protect.
Platforms come in terminus and through types. When you build a station you pick between a terminus platform, where trains end their service, and a through platform, where they continue on past the stop. The footage names both without deep-diving either, but the practical difference is what you would expect: a through platform keeps a line flowing, while a terminus makes the station the end of the line, and every train in it has to leave the way it came.
Upgrading tracks for higher speeds
Base track caps trains at 100 km/h; the next tier up, standard track, raises the ceiling to 160 km/h. The part that makes Transport Fever 3 friendlier than its predecessor is that you can upgrade the track inside an existing station platform without demolishing the station — one playthrough calls this the single biggest improvement over Transport Fever 2. For the full rundown of what else changed between the games, see the Transport Fever 2 vs 3 comparison.
Two caveats are worth planning around:
- Upgraded track pollutes more. The extra speed is not free; the area around an upgraded line pays for it, which matters most where the track threads past housing.
- Upgrades are not cheap. One recorded mid-game upgrade of a long freight line up to 160 km/h track cost around $10 million. That is a single data point from one campaign, not a price list, but it tells you to budget an upgrade like a real project — the money-making guide covers how to judge whether a line earns it.
Common mistakes worth avoiding
Expecting automation that is not in the game. Vanilla Transport Fever 3 has no tool that auto-lays parallel tracks or auto-places signals — every parallel track and every signal goes down by hand. Community mods do fill the gap: one playthrough ran a mod pair that built parallel tracks automatically and dropped auto-signals roughly every 300 meters. Useful to know it exists — just do not design a layout around features the base game does not ship.
Mixing passenger and freight on the same track. Slow freight drags fast passenger services down with it. The footage and its own commentary flag this twice: a passenger trunk line being held up by freight trains, and a 220 km/h multiple unit that could never use its speed because mixed traffic got in the way. The fix in both cases was the same — split the traffic onto separate passenger and freight lines. The industries and cargo guide explains what freight actually needs from a line, which makes the split easier to plan.
Looking for signals on the road side. Rail signals belong to rail. Road interchanges and roundabouts are handled by the road traffic system — traffic lights, lane connections and similar tooling. In one recorded city, junctions controlled by traffic lights jammed for years of game time until the player rebuilt one as a roundabout, which finally kept traffic moving. If your problem is cars rather than trains, the answer lives in the road tools, not the signal catalog.
What is still unverified
The source material is a set of play sessions, not a manual, so a few things stay deliberately fuzzy here rather than being presented as rules.
Details the source footage never clarified
- The units behind the line rate and frequency readouts are never explained in the footage, so treat any specific frequency figure you see quoted elsewhere with suspicion until you can test it yourself.
- Whether the one-pair-per-long-line approach scales to lines far longer than the recorded trunk, or whether very busy single-track routes need a denser pattern.
- Upgrade pricing — the roughly $10 million figure above is one data point from one mid-game line, not a formula.
- Whether signal types or spacing presets exist beyond what the footage shows. Nothing in the source run suggests otherwise, but absence of footage is not evidence.
When a layout problem does not match anything above, the fastest diagnostic is usually the same one the playthroughs rely on: find where trains are actually stopping, then ask whether a signal, a grade, or a shared track is the thing putting them there. And if the whole network feels sluggish rather than jammed, the performance guide covers the system-side causes that sit underneath layout problems.
Related Articles
guides
Transport Fever 3 Beginner Guide: Your First Hours Explained
New to Transport Fever 3? Which mode to start with, how the campaign teaches the ropes, what era progression means, and the principles behind a profitable line.
guides
Transport Fever 3 Campaign Guide: All Eight Missions Overview
The Transport Fever 3 campaign runs eight missions inspired by transport history. How the story mode is structured, what it teaches, and where walkthroughs land.
guides
Transport Fever 3 Industries and Cargo Types: Full Reference
Every Transport Fever 3 industry recipe and cargo type we could verify: logs to planks, oil to chemicals, plus how workforce and boosters drive output.
Was this helpful?